Remote work isn’t going anywhere, and your video presence directly impacts how colleagues, clients, and managers perceive your professionalism. A grainy webcam, echo-filled audio, and unflattering overhead lighting send the wrong message, even when your work is top-tier. Building a solid video conferencing setup doesn’t require a broadcast studio budget or professional installation. Most upgrades take under an hour to carry out and use gear that mounts, plugs in, or sits on your desk without modification to the space. This guide walks through the equipment, positioning, and environmental tweaks that transform a makeshift Zoom corner into a dependable, polished workspace.
Table of Contents
ToggleKey Takeaways
- A professional home office video conferencing setup—combining a quality camera, microphone, and proper lighting—takes under an hour to implement and directly boosts how colleagues and clients perceive your competence and professionalism.
- External webcams ($80–$150) and directional lighting at 45-degree angles provide far greater impact than costly equipment, transforming your on-camera appearance without requiring broadcast-grade technology.
- Microphone quality surpasses camera quality in most video conferencing scenarios; USB condenser or dynamic mics positioned 6–8 inches from the mouth significantly improve audio clarity compared to built-in laptop mics.
- A wired Ethernet connection and 5 GHz Wi-Fi reduce dropouts and latency, with 10+ Mbps upload speed essential for stable HD video calls in shared household networks.
- Physical backgrounds and acoustic treatment (curtains, rugs, foam panels) create a polished appearance and clear sound without relying on virtual filters prone to edge-detection errors.
- Test your entire video conferencing setup—camera angle, mic levels, lighting balance, and internet connection—before important calls to eliminate technical troubleshooting during meetings.
Why Your Video Conferencing Setup Matters More Than Ever
Hybrid work models dominate 2026, meaning video calls aren’t occasional check-ins, they’re daily touchpoints with teams, stakeholders, and prospects. Poor video or audio quality creates friction: clients repeat themselves, managers struggle to read body language, and collaborators tune out mid-meeting.
A reliable setup also reduces cognitive load. When someone doesn’t worry about mic dropouts or backlighting washing them out, they can focus on the conversation instead of troubleshooting tech mid-call. This matters for freelancers pitching projects, remote employees presenting quarterly results, and anyone managing client relationships from home.
Investment here pays off in credibility. A clean image and intelligible audio signal competence, even before someone speaks. Conversely, bad tech makes even experienced professionals seem unprepared. The gap between acceptable and excellent is smaller than most assume, and often comes down to positioning and light rather than gear cost.
Essential Equipment for Professional Video Calls
Camera Options: From Built-In to Broadcast Quality
Most laptop webcams top out at 1080p resolution with fixed focus and narrow dynamic range. They’re usable in good light but struggle with contrast and color accuracy. For anyone spending more than five hours weekly on calls, an external webcam or mirrorless camera adapter is worth considering.
External webcams in the $80–$150 range (Logitech C920, Razer Kiyo) offer better sensors, wider apertures, and adjustable mounting. Look for models with at least 1080p at 30fps, autofocus, and a clip or tripod thread. Some include ring lights, which help but rarely replace a dedicated key light.
DSLR or mirrorless cameras paired with capture cards (Elgato Cam Link, etc.) deliver superior depth-of-field and low-light performance. This route makes sense for content creators or client-facing consultants who record presentations. It requires a camera with clean HDMI output (no on-screen info) and a USB 3.0 capture device. Budget $200+ for a used mirrorless body and adapter.
Position any camera at eye level or slightly above, roughly 2–3 feet from the face. Mounting a webcam atop a monitor often works if the screen height is correct. Avoid looking up into the lens, it’s unflattering and suggests inattention when eyes drift to the screen below.
Microphones and Audio Solutions That Make You Sound Clear
Built-in laptop mics pick up keyboard clatter, HVAC hum, and room echo. Upgrading audio has more impact than upgrading video in most cases.
USB condenser microphones like the Audio-Technica ATR2100x or Blue Yeti sit on a desk or mount to a boom arm. Condenser mics capture detail but also ambient noise, so they work best in quiet rooms. Cardioid pickup patterns reject sound from the sides and rear, focusing on the speaker’s voice.
Dynamic microphones (Shure MV7, Samson Q2U) require closer positioning but handle background noise better. They’re ideal for shared spaces or homes with kids, pets, or street traffic. Most dynamic mics need a boom arm or desktop stand to stay within 6–8 inches of the mouth without blocking the camera.
Lavalier (lapel) mics clip to a collar and connect via 3.5mm jack or USB. They’re discreet and maintain consistent levels when someone shifts in their chair. Wireless lavs add freedom but introduce battery management.
Headsets work in a pinch, especially models with boom mics positioned near the mouth, but they limit movement and aren’t viable for client-facing calls where on-camera appearance matters. Skip Bluetooth headsets for critical calls: latency and compression degrade quality.
Whatever mic is chosen, use a pop filter or foam windscreen to reduce plosives (hard “p” and “b” sounds). Position the mic slightly off-axis from the mouth to minimize breath noise. Test levels in the conferencing software beforehand: aim for peaks around –12 dB to leave headroom without clipping.
Optimizing Your Lighting for a Polished On-Screen Appearance
Lighting determines whether someone looks sharp or washed-out. Natural light from a window works during the day but shifts in color and intensity, and backlighting from a window behind the desk creates a silhouette.
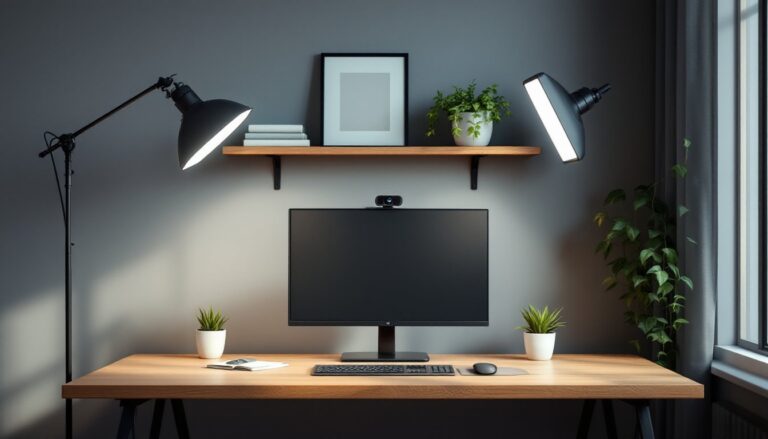
Key light is the primary source, positioned 45 degrees to one side of the camera at eye level or slightly above. A 5000K–5600K LED panel (also called daylight-balanced) mimics midday sun and renders skin tones accurately. Panels in the 15–30 watt range cost $40–$100 and mount to light stands or clamp to desktops.
Fill light softens shadows on the opposite side. It should be dimmer than the key, roughly half the intensity. Some setups use a reflector (white foam board or collapsible disk) instead of a second powered light. Position it close enough to bounce key light back onto the face without appearing in the frame.
Backlight or rim light separates the subject from the background, adding depth. A small LED strip or accent light placed behind and to the side, aimed at the back of the head or shoulders, prevents the “floating head” look common with single-source setups.
Avoid overhead lighting alone: it casts shadows under the eyes and nose, creating an unflattering appearance similar to poor camera positioning. Ceiling fixtures should supplement, not replace, directional sources.
Test lighting by recording a short clip and checking for hot spots (overexposed patches on the forehead or nose) and deep shadows under the chin. Diffusers, translucent panels placed between the light and subject, soften harsh beams. Softbox attachments for LED panels serve the same purpose and cost $15–$30.
Color temperature consistency matters. Mixing 3000K (warm) lamps with 5600K panels creates an unnatural color cast. Stick to one temperature across all sources, or correct in software if the conferencing platform allows white balance adjustment.
Creating the Perfect Background and Room Setup
Backgrounds communicate context. A tidy bookshelf, neutral wall, or organized workspace suggests professionalism. A cluttered laundry pile or unmade bed in the frame does the opposite.
Physical backgrounds beat virtual filters for realism. A solid-colored wall 3–5 feet behind the desk provides separation and avoids the halo artifacts common with software background replacement. If the wall color is too bright, it reflects light back onto the subject: if too dark, the person blends in. Mid-tone grays, blues, or muted greens work well.
Shelves with a few books, plants, or framed items add visual interest without distraction. Avoid busy patterns, bright posters, or anything that moves (ceiling fans visible in frame, for example). Position objects at varying depths to create dimension, but keep them out of focus by sitting farther from the background.
Virtual backgrounds in Zoom, Teams, or Google Meet rely on edge detection or green screens. They work acceptably on newer computers with dedicated GPUs but struggle with flyaway hair, glasses, and movement. A collapsible green screen ($30–$60) improves keying accuracy and eliminates background processing lag. Mount it on a stand or hang it from a curtain rod behind the desk, ensuring even lighting across the fabric to avoid color spill.
Soundproofing isn’t structural work, but acoustic treatment reduces echo and improves mic clarity. Foam panels, heavy curtains, or even a thick rug dampen reflections in small rooms. Bare walls and hardwood floors create reverb that makes voices sound hollow. A space designed for comfortable productivity naturally benefits audio quality.
Desk placement matters. Facing a window provides natural fill light but risks glare on the screen. Positioning the desk perpendicular to the window lets someone control light direction with blinds or sheer curtains. Avoid placing the desk against a wall if possible: a few feet of clearance behind the chair prevents a cramped, confined look on camera.
Internet Connection and Software Considerations
Bandwidth dictates call stability. Video conferencing consumes 1.5–4 Mbps upload per HD stream, depending on resolution and codec. Most home broadband plans emphasize download speed, but upload matters more for sending video to other participants.
Test upload speed using a service like Speedtest during peak hours (evenings, weekdays). If it’s under 10 Mbps and multiple people share the connection, consider upgrading or scheduling bandwidth-heavy calls during off-peak times. Wired Ethernet connections eliminate Wi-Fi dropouts and reduce latency. Run a Cat5e or Cat6 cable from the router to the desk if feasible: even a 25-foot run costs under $15 and removes a major variable.
If Ethernet isn’t practical, position the computer within line-of-sight of the router and use the 5 GHz Wi-Fi band instead of 2.4 GHz. The 5 GHz band offers higher throughput and less interference from microwaves and cordless phones, though range is shorter. Powerline adapters are an alternative, sending network traffic through household wiring, but performance varies with electrical panel configuration.
Quality of Service (QoS) settings in some routers prioritize video conferencing traffic over downloads or streaming. Enable it if available, assigning high priority to ports used by Zoom (8801–8810), Teams, or other platforms. Check the router’s manual or admin interface.
Conferencing software impacts performance, too. Platforms like Zoom and Microsoft Teams include settings for bandwidth optimization: disabling HD video, turning off virtual backgrounds during low-bandwidth situations, or reducing frame rates. In Zoom, “Enable HD” under Video Settings demands more upload: turning it off drops the requirement to ~1 Mbps without drastic quality loss on smaller screens.
Update software and device drivers regularly. Outdated webcam drivers cause frame drops and color issues: old conferencing clients miss performance patches. Enable auto-updates or check monthly.
Close unnecessary apps before calls. Web browsers with dozens of tabs, cloud backup syncing in the background, and software updates all compete for bandwidth and CPU cycles. On Windows, Task Manager shows which processes hog resources: on macOS, use Activity Monitor.
Test the full setup, camera, mic, lighting, background, and connection, before the first important call. Record a meeting or use the platform’s built-in test feature. Adjust mic gain so it doesn’t peak (distort) or sit too low (forcing others to max their volume). Confirm the camera isn’t backlit and the frame is level.
Many workspace strategies emphasize ergonomics and organization, but video presence is now part of that equation. A setup that looks and sounds professional becomes second nature after a few calls, freeing attention for the work that matters. Small investments in lighting, audio, and connectivity compound quickly, especially for anyone whose income depends on remote communication.
For those just getting started with remote work, applying beginner-friendly techniques builds confidence and consistency. Whether someone’s a freelancer, employee, or running a side business, the ability to show up clearly and reliably on video is no longer optional, it’s baseline professional infrastructure.